CLICK HERE FOR FREE BLOG LAYOUTS, LINK BUTTONS AND MORE! »

Pages

Monday, November 26, 2012

Christmas “JOY”

DSCN0731
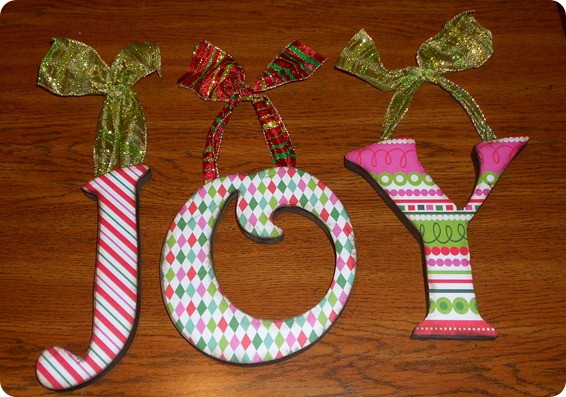
Well, this is what the Holidays are about, right? A time of  year when we try and remember all the Joy in our lives and share a little with others. So why not say it in a fabulous way?  Hang it high for all to see!!!!  Sorry, I got carried away!

I picked up these letters from Pat Catan's for about $2 a piece. That also where I got the GLITTERY ribbon.  I found the scrapbook paper at Wal-Mart for 97 cents a pack….can’t beat that!
First I stained the edges of the letters using a dark brown stain.  I let that dry overnight.  Now comes the fun part – the part where I get to Mod Podge…yayyyyy!  I cut the scrap book paper about an inch larger than the letters on all sides, Mod Podged the hell out of the front of the letters and laid the paper down.  Carefully smooth any bubbles out from under the paper taking care not to shift the paper or rip it – that would be BAD.  Again, let that dry overnight, or over three nights, however long it takes for you to get back to it.  Having a 2 1/2 year old I sometimes have projects laying around for weeks before I have a chance to get back to them, but I digress.

Once this is nice and dry, lay the letters (paper side down) on a cutting mat and trim off the excess with an Xacto knife.  Get as close to the wood as you can, but down freak out if there are rough edges because we’ll take care of that.  Once you have all the letters trimmed, take a piece of fine sandpaper and clean up those edges.

Now it’s time to bring the stain back out.  Well, that is if you even bothered to put it away in the first place, which I can’t say I always do.  For this part you can either use a sponge brush or a cheap little paint or artist brush.  Dip your brush of choice into the stain, but do not saturate it.  Now take your brush and blot it onto a folded up paper towel, getting as much stain off as possible.  It’s time to dry brush people!!!! Take your blotted brush and starting from the edges of the letters dry brush the stain toward the middle.  How far into the center you dry brush is completely up to you.  I stopped about a half inch from the edge, but that’s just my preference.  When I was done with my brush I just threw it away because I didn’t want to put the work into cleaning the stain out of it – that why I used a 25 cent sponge brush.

Next I cut my choices of ribbon about 10 inches long.  I gathered one end of the ribbon and stapled it to the back of my wood letters.  Then I tied a double knot in the ribbon, trying to keep the length consistent between all three letters.  For me the same length wasn’t crucial because I plan to stagger them when I hang them.  If you want them to hang the same height that’s going to take some more time and patience on your part – good luck.
When I’m ready to hang all the Christmas decorations, I’ll just throw up some Command hooks and enjoy the JOY of the Season.  I just love this time of year.  Hope you enjoy and try to make some JOY of your own!

HAPPY CRAFTING!!!

Kim
Saturday, November 24, 2012

Upcycled Christmas Decorations

Well, Christmas crafting is occurring at a feverish pace around here.  Last year I developed a small obsession with pallets thanks to Pinterest.  I had dreams of a pallet palace, but that dream died quickly when I realized how difficult it is to find QUALITY pallets around here.  I did, however, pick a few up roadside and they sat, collecting dust in my garage until just a few weeks ago.  While reorganizing the disaster I call a one car, I’ll never see a car inside of me garage I decided to cut up the pallets to save room. 

Then it hit me…..CHRISTMAS IS COMING!!!! I remembered the cutest wood sign I saw over at Eyeballs by Day, Crafts by Night and thought that some of the pieces I had cut would be the perfect size.  So began my adventure with Christmas crafting using reclaimed wood.  OK so it wasn’t reclaimed from a cool barn or anything, but it WAS reclaimed from that place that was just gonna throw it away.  Maybe we should call it Christmas crafting with rescued wood.  There – that’s sounds better.

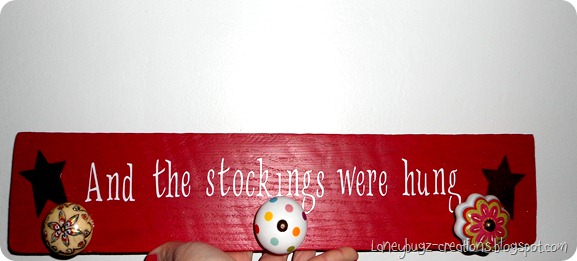
Anyhow, I grabbed a piece of my rescued wood, slapped on a couple coats of Glidden Candy Apple Red paint and I had the base for THE CUTEST little Christmas stocking wall hanger I have ever seen.  You see I have neither a fireplace nor a mantle, so my poor Christmas stockings have lived haphazardly tied onto the wrought iron railing in the living room and people that’s just wrong!!!!
A few rusty tin stars from Pat Catan's and some white lettering cut out on my fabulous little Cricut mini and HERE IT IS:
DSCN0737

Oh my goodness, I almost forgot the knobs.  Three of the cutest little drawer pulls that I got for 50% off at Hobby Lobby and we have perfection.  Alright, maybe not perfection, but it’s freakin’ cute!!!!

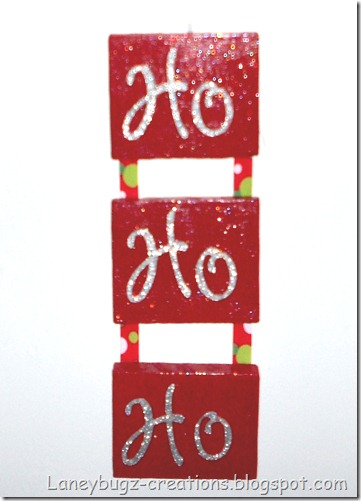
Then I figured I already have the red paint and the wood, why not try something else?  So I cut three pieces about 5 inch wide, sanded them down and painted them with my Candy Apple red. The next part involves one of my favorite things in the world, call it an addiction if you will – GLITTER! Glitter makes me happy, happy, happy.  As a matter of fact, I have been known to say that Glitter is a single, crafty woman’s crack cocaine!!!

Anyway, I just happened to have some silver glitter card stock lying around.  So, I cut out some more letters on the Cricut mini and slapped them on with some Mod Podge.  Then I got to use another one of my favorite products – GLITTER MOD PODGE.  I was in Heaven……aaaahhhhh.DSCN0745

Once the glitter Mod Podge was all dry and I came down from my crafter’s high, I stapled some fabulous grosgrain ribbon on the back.  I also hammered a saw-toothed picture hanger to the top of the top block. 
I still have plenty of rescued wood left.  I’m not exactly sure what I’m going to craft with it just yet, but I’ll keep you in the loop!
As always – HAPPY CRAFTING!!!


- Kim

Tuesday, November 20, 2012

Glitter Ornaments

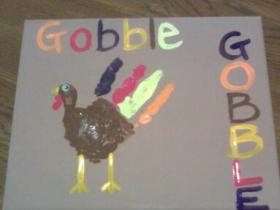
My poor little blog.  I have neglected you so.  Laneybug and I have been busy with playdates, Halloween, crafting and trips to the park.  I am somewhat obsessed with Holiday decorating using the bug's hand/foot prints.  This is what we've crafted up for Thanksgiving so far: (Sorry the pics are subpar.  I took them with my phone)

An 8x10 canvas, Laneybug's foot for the body and her little fingerprints to make the feathers, voila it's a Turkey.  We dressed him up with some googly eyes and Turkey stickers from Pat Catan's.

Here's another happy little Tom Turkey we crafted, again using an 8x10 canvas.  Just painted up that little hand of hers and away we go.


Somehow I've managed to get some Mommy Crafts done too.  I absolutely love, love, love these glitter ornaments.  I found the inspiration and directions on Pinterest.  Lots of people are making them and they're super easy.  Just a little floor wax ( I used good ole Mop N Glo) swished around the inside of a glass ornament, dump out the excess and then drop in some glitter and shake.....AMAZING. 


I'm going a little nuts with them, but they're soooo cute.  Cut a little vinyl on the cricut and they're personalized.  EVERYONE is getting ornaments this year.  The bug's entire daycare class will have one :)


HAPPY CRAFTING!!!!!!!!!!!!!!

- Kim